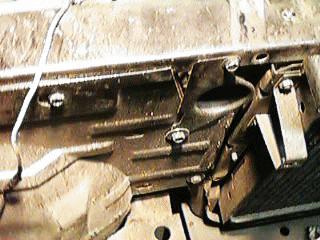
This is a shot of the radiator frame before I took it apart. Pretty dirty
really before I removed the sheet metal and stripped and repainted it.
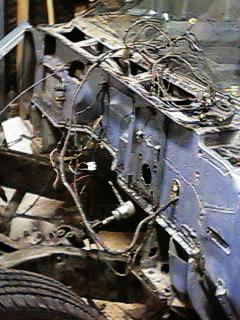
Look at that Firewall, what a mess, I really needed to get the wiring harness
out at this point and repair and replace most of it. I ended up re-wrapping most
of the harness and replacing worn or broken connectors.
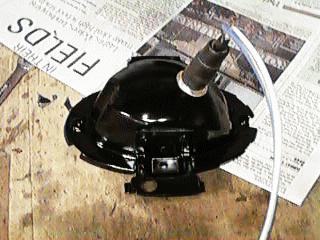
So far its mostly been allot of pictures of old rusty car parts, here is
a blinker body after restoration. It was bead blasted and repainted with under
hood black. I find that bead blasting rubber and plastic, as well as metal is
the best way to clean it up.
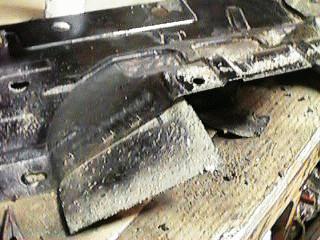
This is a section of the front wheel well, with a mud flap. The mud flaps
are stapled on from the factory. new material is available from several vendors,
but the stapling is tough, I used pop rivets to replace these, but know of others
who went to the trouble to make new staples. On most cars of this era everything
is covered in tar undercoating. I use a butane torch to melt the tar, and then
scrape it off with a paint scraper. Not exactly fun work but the results are worth
it.
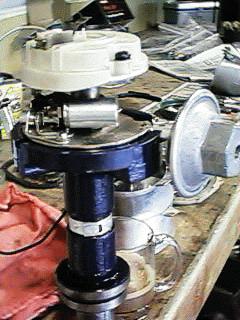
Here is the Distributor after restoration. I'll probably replace the points
with solid state ignition eventually. Its pretty much impossible to spot CDI ignition
unless you take off the rotor cap. Only I will know, and the car will run cleaner
and smoother with the hotter spark. Notice my mug on the work bench. Nothing like
a good coffee while restoring.
This is the Grill. I took the entire grill apart and cleaned everything
with a buffing wheel. The previous owner had accidentally spray painted it from
behind. It looks like new now! The really hard core restoration guys send all
of these parts out for new anodizing, I just couldn't see doing it for a driver.