Interior, Light at the end of the Tunnel!
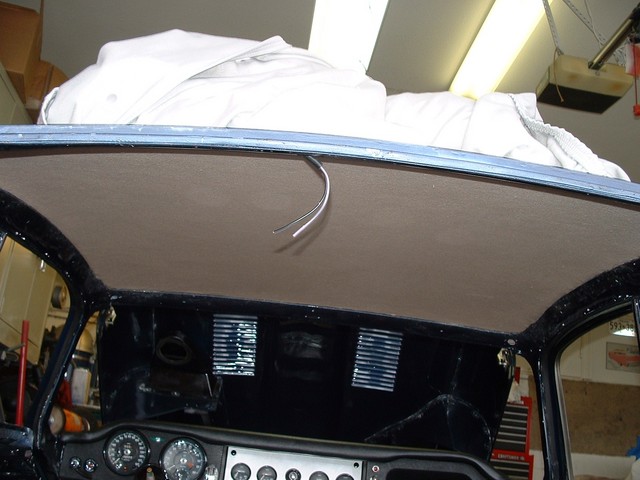
The approach on the interior installation is to start at the top! It is best to get the headliner up before installing anything else. Crawling around on new carpets trying to get the headliner would obviously not yield the best results. I used 3M heavy-duty contact cement, which I found out about a month after doing the install wasn't very good. The headliner fell and I now need to replace it. There are many types of 3M contact cements. More research will be needed to find a better product, at the time of this writing I haven't researched or replace the headliner.

Cutting the edges of the headliner and tucking them under the edge of the roof supports is tricky. Good sharp razor blades are required and you'll go through many installing an interior. I used a clean screw driver to push the edge of the headliner under railing and then razor bladed off the excess material.

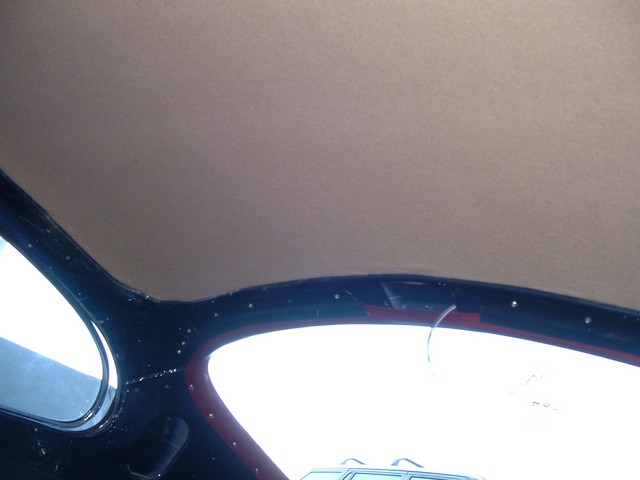
I didn't get the plastic coping around the rear hatch with the car, however it is available in three colors from XKs Unlimited. Installation was relatively straightforward. Simply drill holes and pop riveted it in place. I recommend putting the pop rivets as far out to the edge as possible, so they don't show when the rest of the interior is in place, you can see some of them on my install, I'll probably end up painting them red so they aren't noticeable. Be careful not to get carried away with the drill, it’s easy to ding the panels from the inside and cause issues on fresh paint.

On the upper edge of the plastic coping, Jaguar used some little metal clamps. It’s not clear why they chose to do it this way probably they were having problems with pop rivets near the edge of the roof stiffener. I installed them back into the original holes from the factory.
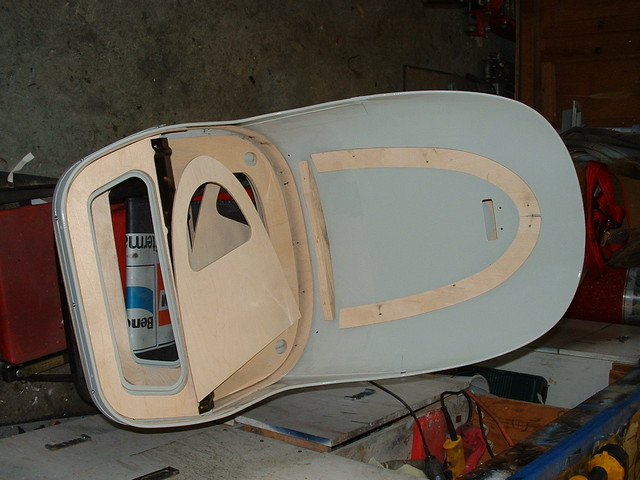
I had a hard time figuring out how this should go back together and could find very few detailed photos online.
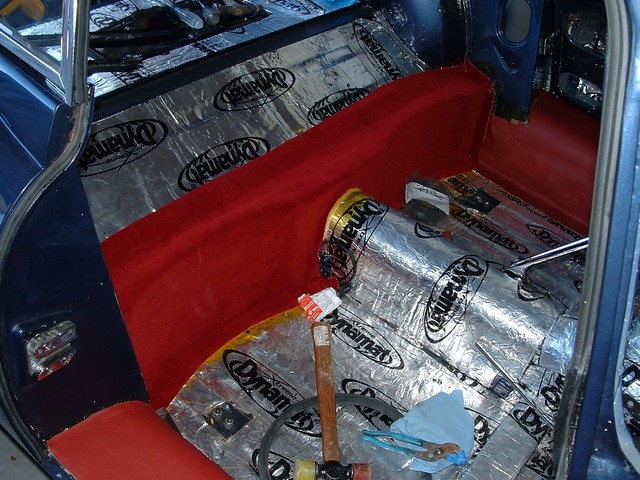
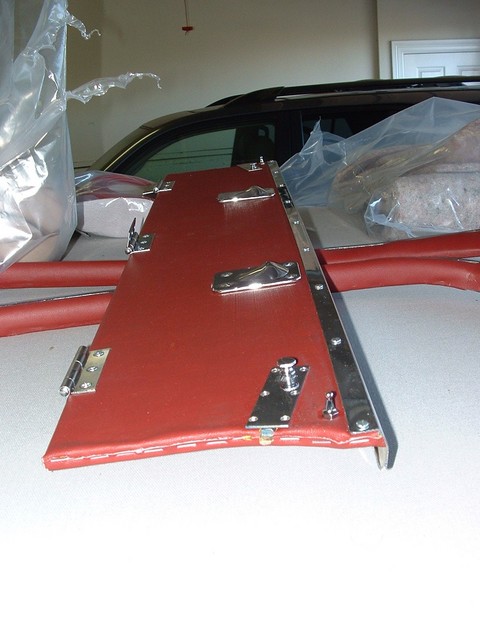
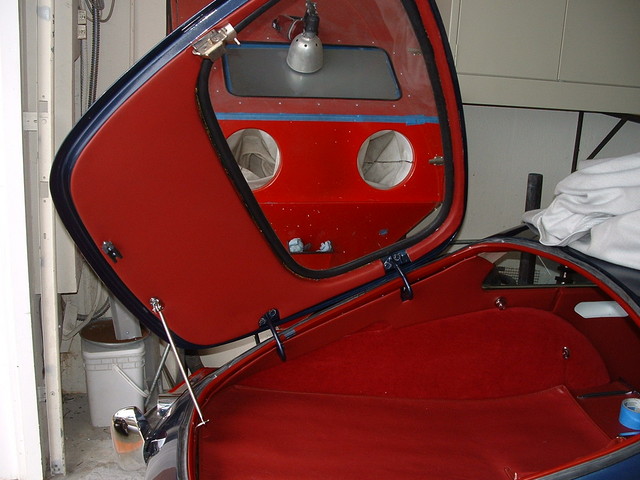
The hatch bottom panel came from OSJI precut and covered. It has extra material to go up to the edge of the rubber gasket. It was straight forward to install. The hatch prop and latch went on after the panel snapped on.
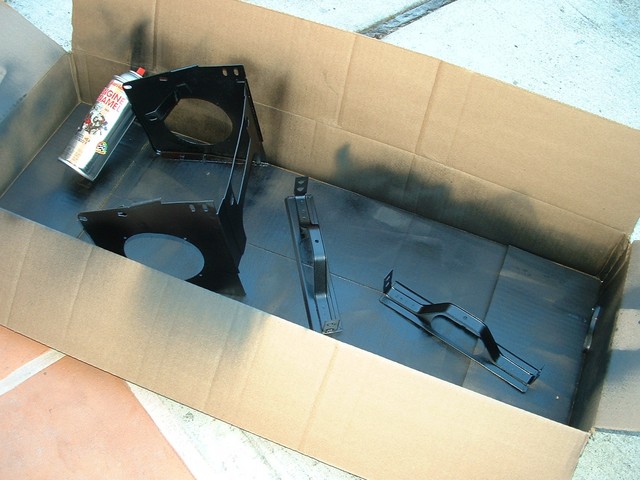
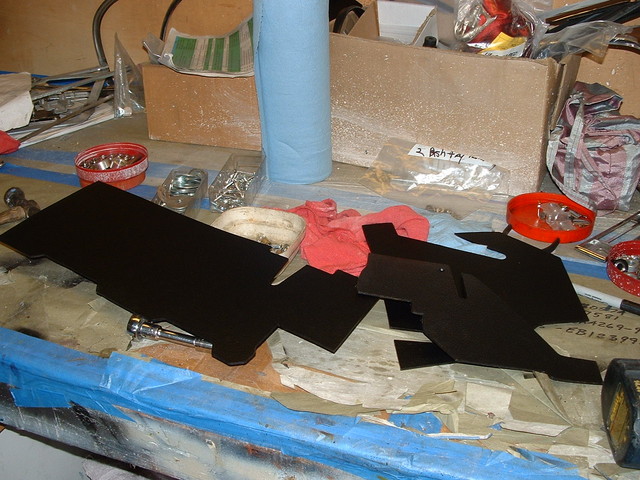
Here are some of the interior parts getting fresh black paint. It's a simple bead blast and spray job. I had planned on making up to radio consoles. One with a correct 60s Blaupunkt and the other with a modern radio, however with the advent of modern digital music on the phone, I will use a FM radio adapter and live with the old radio. Frankly tunes aren't really what the car is about.
All of these panels were precut with the kit. Which didn't mean there was no trimming but did make it easier to install. I used 3M brush on automotive contact cement for all of this. I opted to use a more modern neoprene foam under the sill covers based on some recommendations of owners who noticed the foam with the kit doesn't hold up.
Covering parts like this cubby box lid was simple. The cantrails seen in the rear of the photo were a bit harder. There is a small chrome strip that snaps on the top of the rail after the covering is on. This was not fitting for me at all until I reshaped the strip before installing. It really should be the exact shape as the cantrail before clipping on. Glue alone won't hold.
Another picture of the cubby lid, I borrowed an air staple gun from a friend which is an absolute must have tool for this work. I used thousands of staples. I had all of the interior chrome parts plated and waiting before I started the interior. Except for a few missing screws it was smooth and simple.
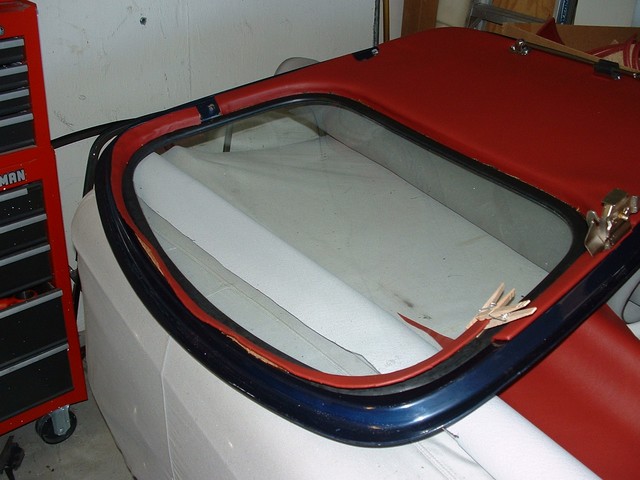
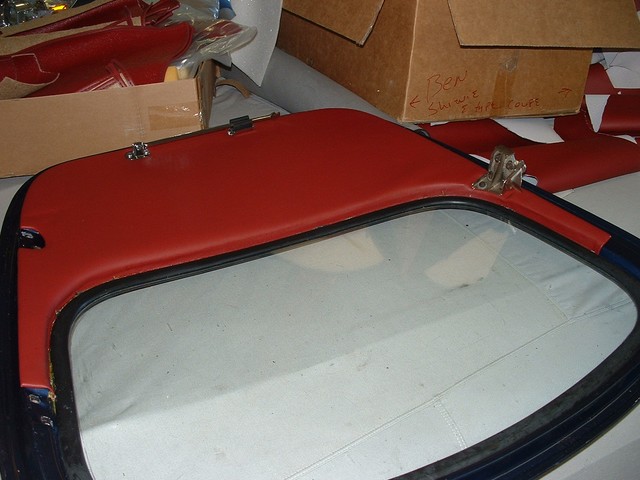
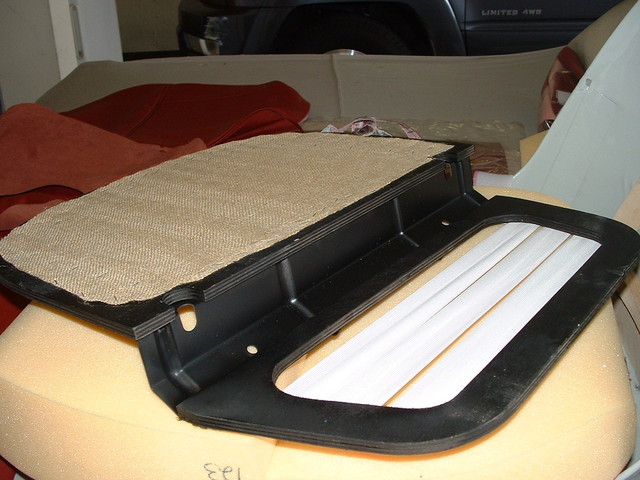
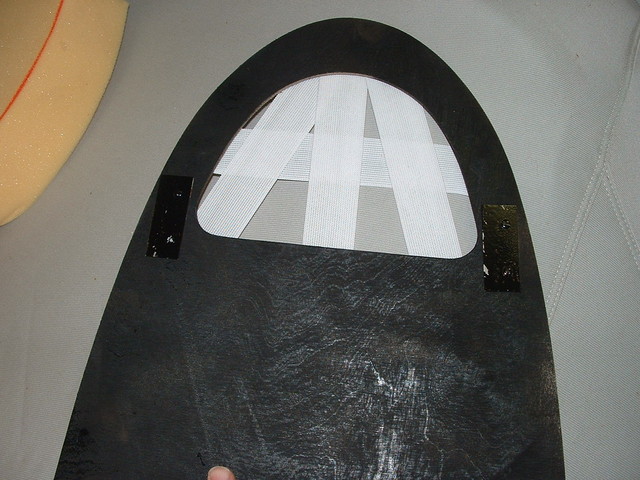
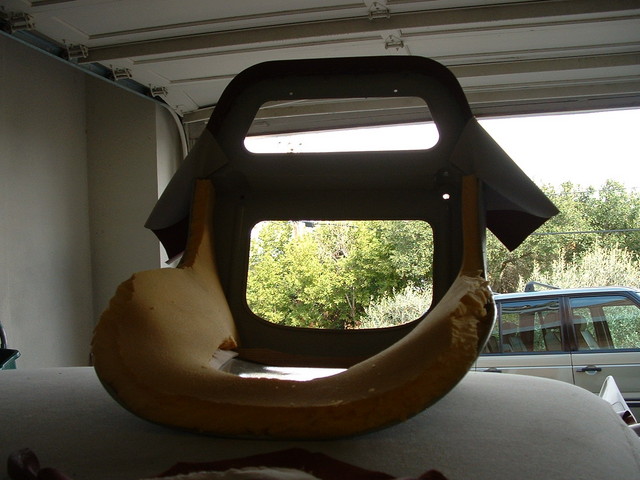
The top of the rear hatch window trim is made of a pre-formed card board. This didn't come with the kit, but fortunately I saved the original. It wasn't in great shape but after a little tweaking, it was read for recovering. This part is glued to the hatch. It requires some special attention to stick correctly. I used automotive trim glue and contact cement made by 3M.
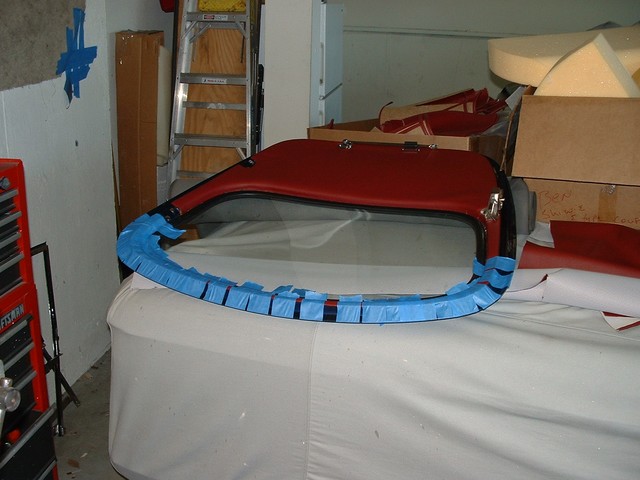
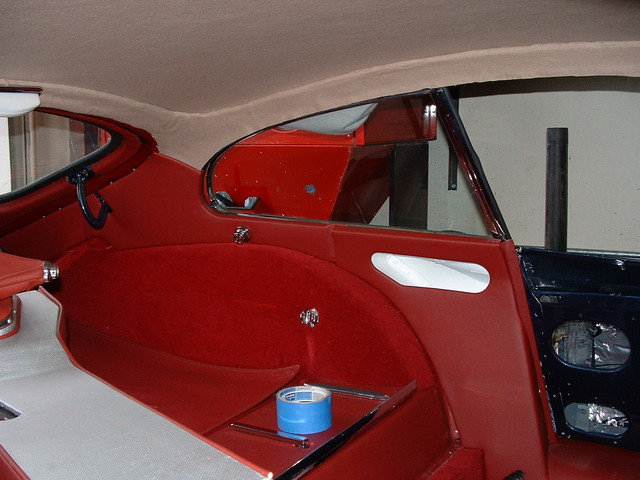
Tape held the trim in place over night until the glue dried. Keeping this trim on the hatch is a known problem on FHC interiors.
Here's a better picture of the sill covering. Just make sure you have plenty of contact cement. I went through two plus quart cans of 3M automotive contact cement and four spray cans.
The wheel arch covering is a real delicate thing. It is very difficult to get it on without any wrinkles or creases. It's a one-time shot. Once you have the contact cement on both sides, the material goes on one time any lifting and refitting isn't really possible, so make sure you get it straight. I started at the middle bottom and worked my way out. Not sure if this is the best way to do this but it came out pretty well on the driver's side. On the passenger side, I ended up with one big crease that I had to cut out. I will get a dark red magic marker to cover the cut line. It will be hard to notice once everything is done.
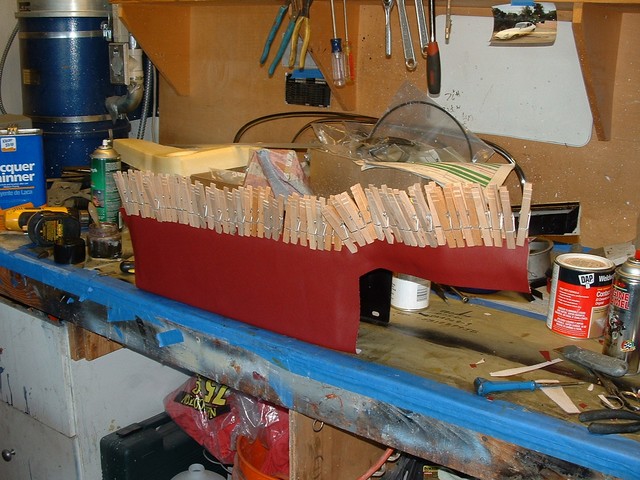
The center console must look perfect. It is something that you look at every time you get in the car, and which is easy to damage. I used clothes pins to hold the material down while the glue dried. The pins left some small marks. I'm hopeful
that over time these dimples will come out.
The ash tray plate also was clothes pinned. You can see some small marks where the clips came off. These have faded with time but still are visible at the right angle. I would not recommend clothes pins, tape is probably a better solution.
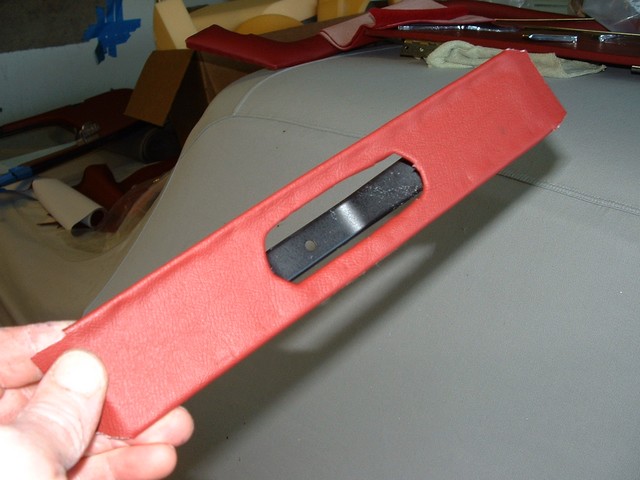
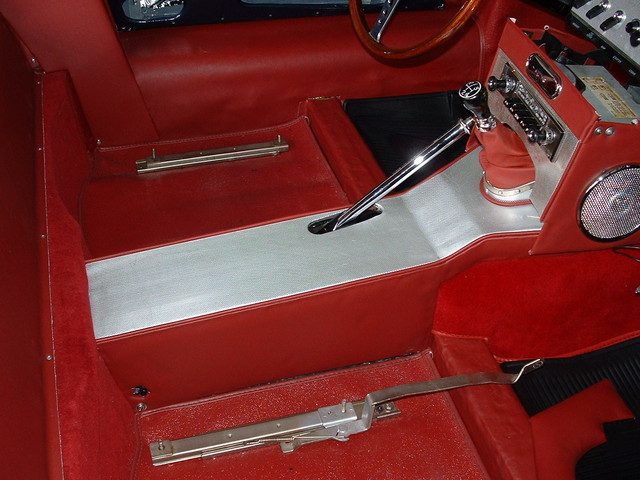
The center console is ready to install. It’s tricky getting the aluminum in and the beading that goes all the way around the console. I opted to put some screws in from the bottom to hold the aluminum instead glue as it came from the factory. If I ever need to take it off it won't be a problem. The beading came with the OSJI kit however they didn't have enough for all the places it was required. So, I made some of my own with weed whacker line. If you look closely you can see the little dents the clothes pins made in the covering. They continue to fade but still can be seen. I would recommend using a wood caul to prevent this.
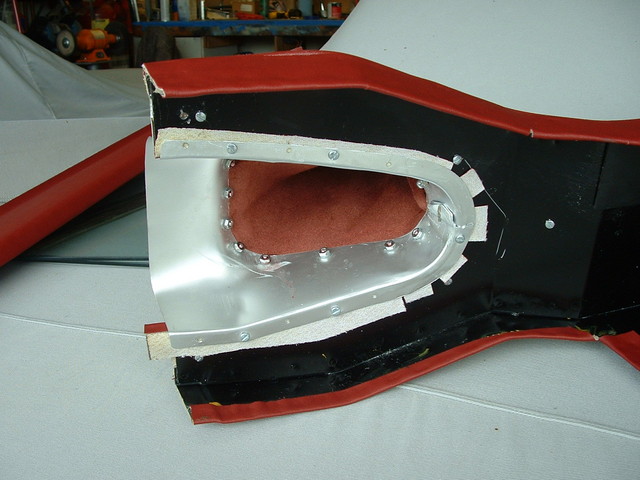
Here is a shot of the underside of the shift boot and housing. These came from the factory with aluminum rivets pressed in to hold the shift boot, mine long gone and so instead of pressing rivets, I threaded them and put number eight nuts on with some lock tight. If I ever need to replace the shift boot this is something I can remove with little effort. Also see the screws through the console to hold the aluminum in place.
In this picture see the one small dent where I went a little far with a screw. Its right there at the front edge of the aluminum. It won't show when the radio console is in. On the aluminum, It was re-anodized in hopes of making it look new. The texture isn’t exactly as it was from the factory but it all matches and looks good. There were a few very small scratches that you can see at the right angle, but when installed you’d need to lay down on the seat to see them. This hash pattern aluminum was only used in late 62 and early 63. Original parts in good condition are nearly impossible to find. At the time of this writing I couldn't find a source for replacements. Its just not enough of a market. Most people settle for the "dot" pattern which has been on the market for years.
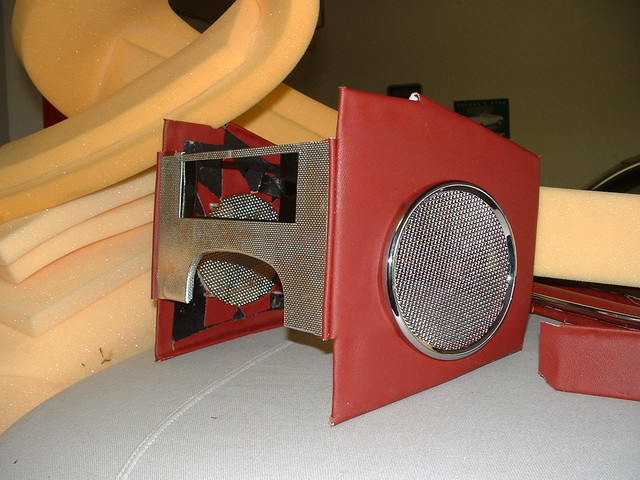
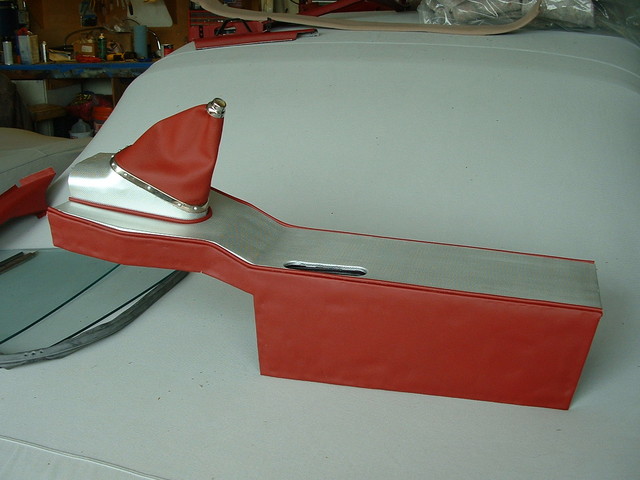
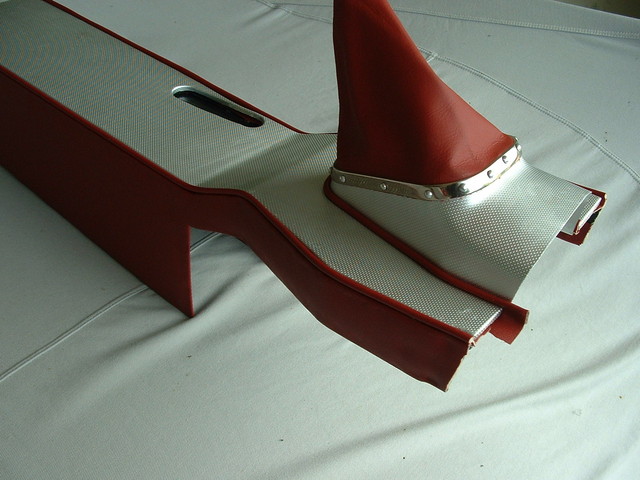
The radio console was simple enough to cover. The beading is some of the stuff I made with weed whacker line, hard to tell it’s not factory. I had the speaker grills chrome plated including the screen. The hash pattern aluminum radio frame is original, I didn’t have this part re-anodized so the texture is slightly shinier than the rest of the trim.
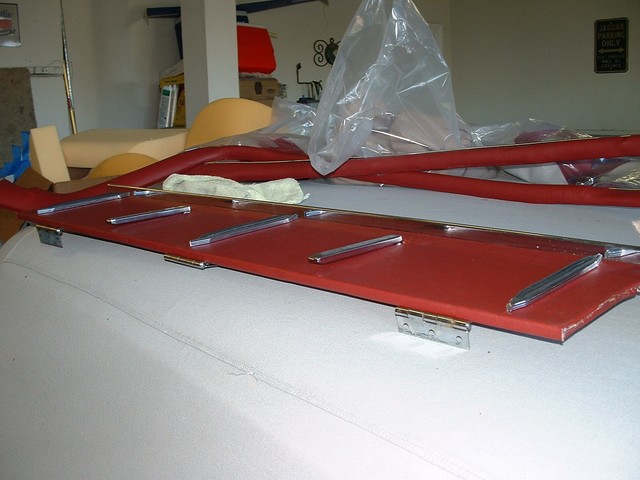
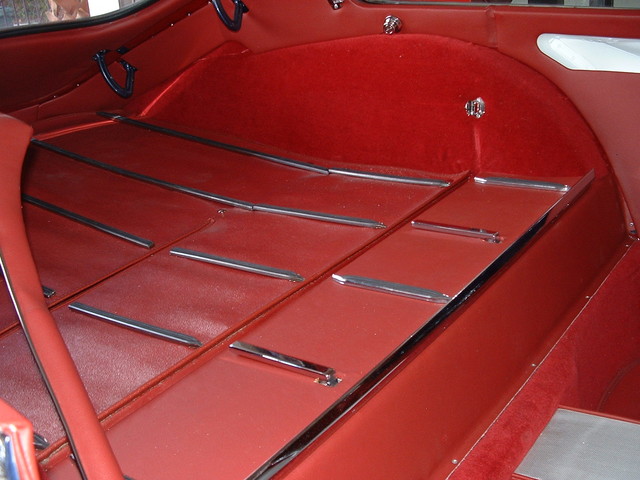
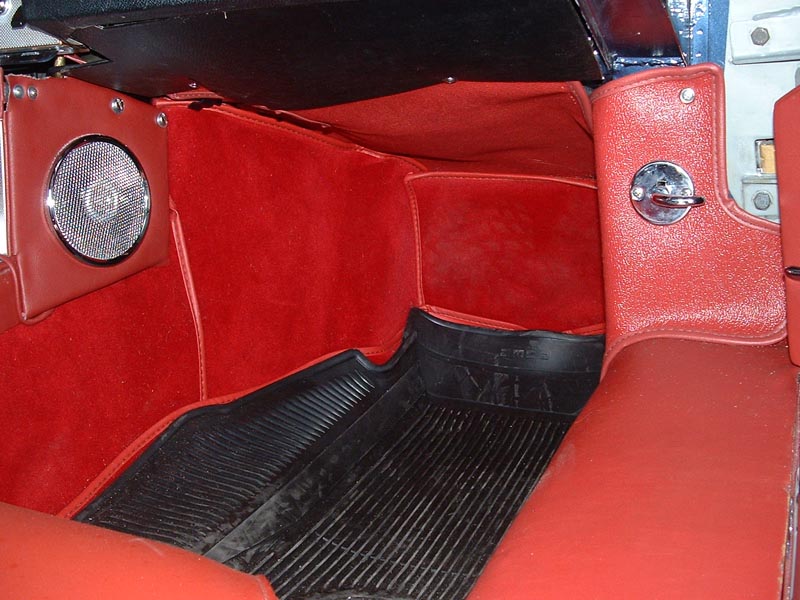
Several things are coming together here. The hatch is back on, the side panels are in etc. I still have some fine tuning to do on the hatch fit, when closed but it opens as it should and looks great here. I don’t have the luggage runners installed on the floor mat yet but that will come soon.
The cubby and side panels are in and the roof rail fabric is glued. This is one of the hardest things I found to get right on the interior. It’s not easy to get this to tuck up under the headliner. From the factory, there was horse hair matting under the fabric. I used some flannel material found at a local fabric shop. It came out pretty well however, there are a few ripples. You can also see some of the rivets from the hatch coping showing from under the rear side panel. I plan on doing this over at some point.
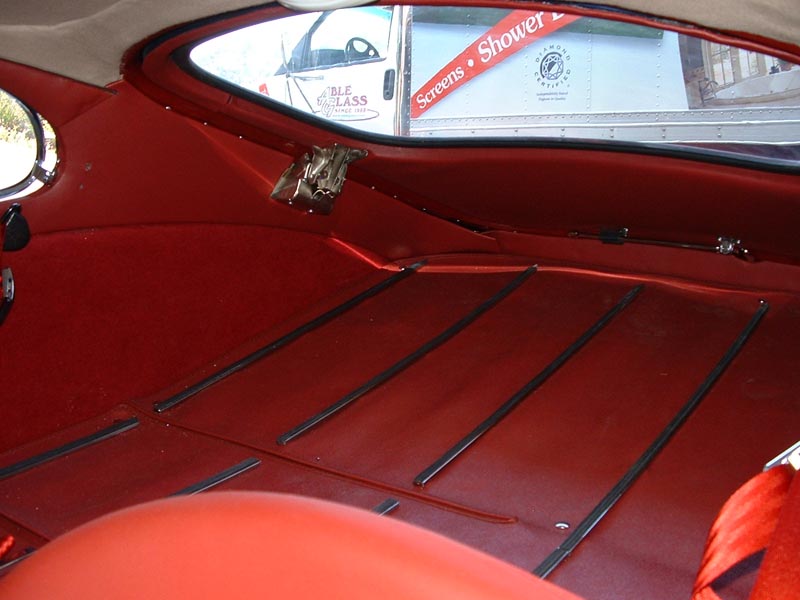
Before I could install the luggage strips I had to find some. When I got the car the entire luggage mat was missing! I called around to a bunch of places and finally found a set of 2+2 luggage strips from Jaguar Heaven. They weren't exactly correct but were expensive. I cut them to fit this car and tapered the ends as was common on 63 era cars. They are pop riveted to the mat. On original cars, snaps were used to hold the carpet and luggage mat in place It looks pretty good.
This is the under-dash cardboard that keeps all the wires out of the way. It comes as a kit from XKs Unlimited. I had to modify them slightly. I suspect these are designed for both 3.8 and 4.2 cars.
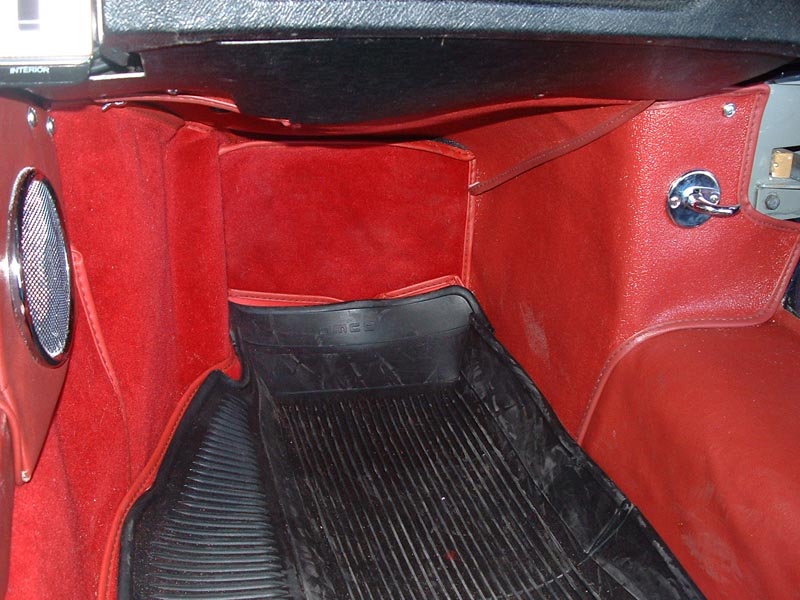
Here is the cubby area along with the luggage runners, looks about right to me. Most of the interior parts are installed with pop rivets. It really goes to shows that they were small production run car. Factory built US cars rarely use pop rivets.
Installing the carpets was straight forward. It’s a bit messy with the contact cement but nothing that requires special tools or skill. A good sharp box knife and razor blades are useful for minor fine fitting. The carpet sections came from OSJI pre-sewn and edged. Around the center console make sure to cut the under felt out below the center console. The console will need every bit of space it can get to let it press down low enough so the radio console will fit and the ash tray etc. I cut this all out when working on the radio console install. Putting snaps on the carpet was easy enough. I had to tinker around a bit with the location of the snaps and the under felt but it was nothing major. Fitting is mostly trial and error, especially for a first-time installer.
Here is another picture of the carpets as they are going in. They are fairly stiff and take some time to form to the body of the car. I used spray contact cement both on the under felt and the carpets along the center console. On the floor, I glued in the under felt but didn't put glue on the carpets. The snaps should hold them in. I haven't installed the under-dash cardboard here.
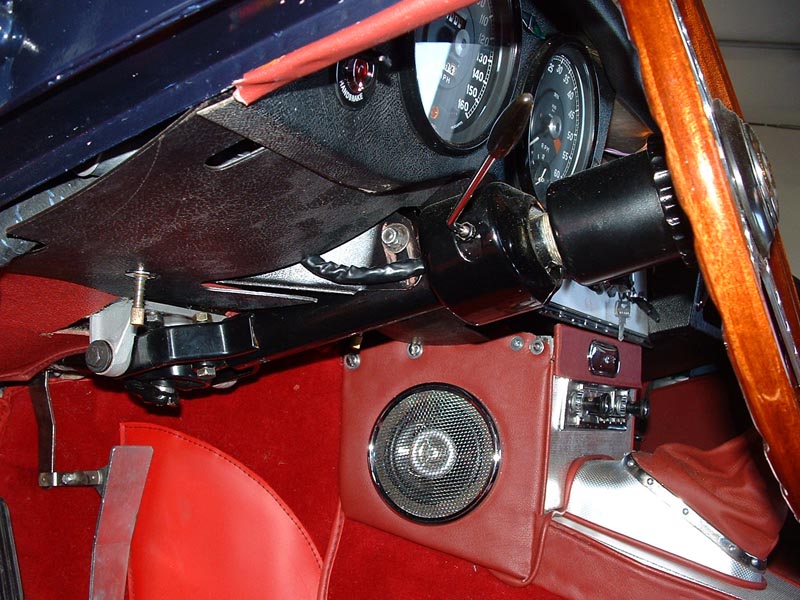
Here is a later picture of the under-dash cardboard. This is precut and goes in with only a few screws and the nut from the clock set and odometer reset button seen.
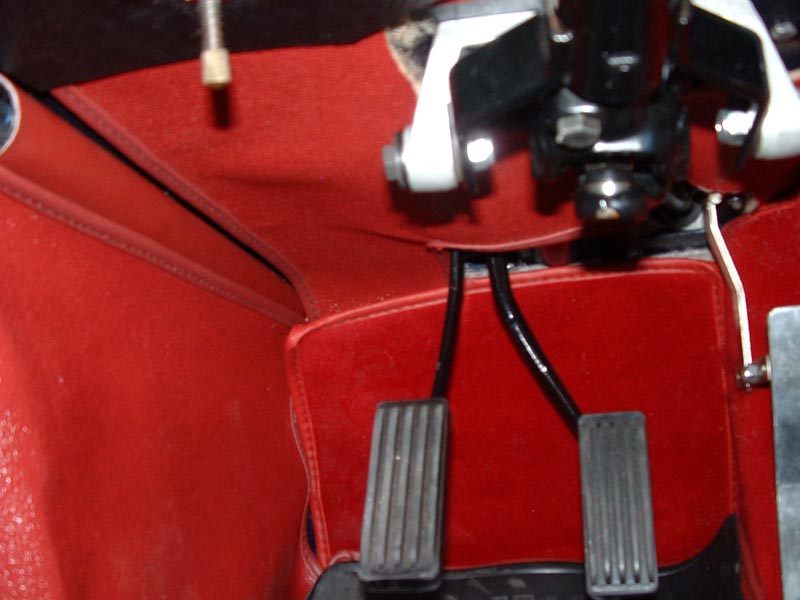
Beyond the cardboard there are a few pre-cut and edged Hydra parts that come with the kit. They glue in with contact cement and over up the sub frame bolts and underside of the brake and clutch box. Minor cutting is required to get a proper fit, simple trial and error.
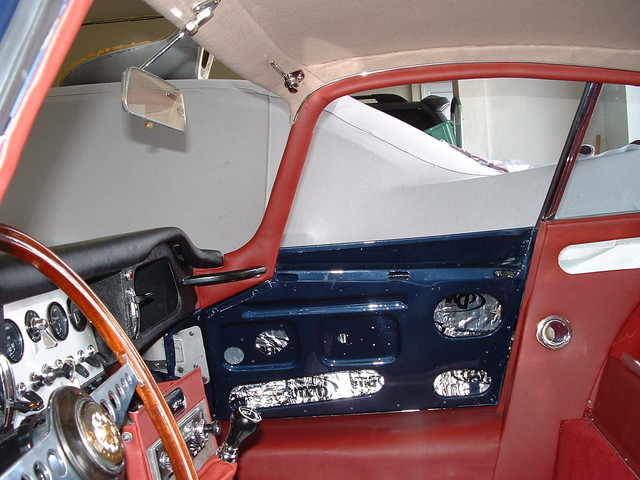
The cantrails went in with small screws through the lower edge of drip rail, this required removal of all the rubber on the outside. I should have waited to install the rubber until after the interior was done. The grab handle on the early 3.8 liter cars bolts directly to the dash. Later they went to a different arrangement with two brackets. I simply painted the original leather, looks like new.
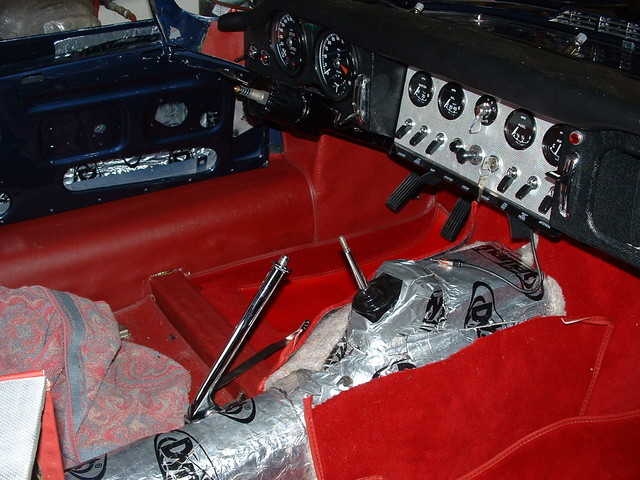
I didn't take many pictures
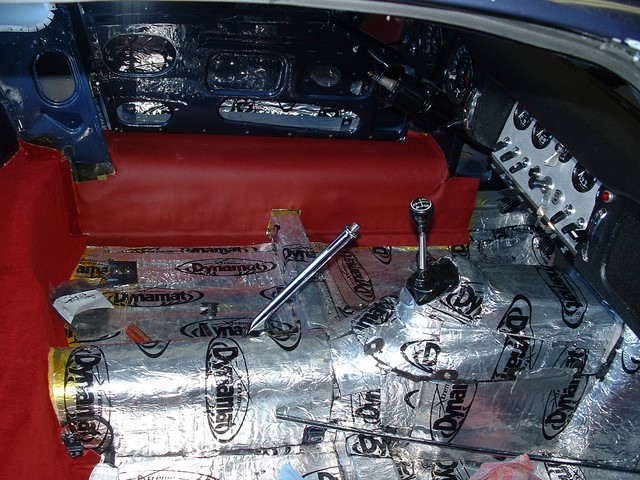
of this area as it went in, but it was a real challenge. The center console is a very tight fit over the transmission tunnel. The space required to allow the radio console to fit was very limited. I must have put the console in and out about 30 times before it fit low enough to allow the console to correctly line up with the mount points. There are three screws at the bottom of the console.
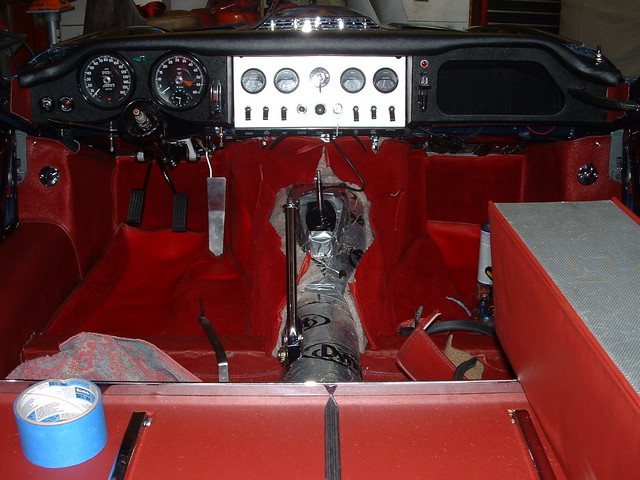
One of them is visible on the left. After these are in, cut all the insulation and even the Dyna-mat out around the upper area on the console to allow space for the radio console to fit. There is very little room for the radio. I used a period correct Blaupunkt which had a separate amp and receiver. The amp was connected with a short umbilical cord which allowed the amp section to be fitted behind the glove box.
The last piece to install was the ash tray, to create enough space I had a 200 pound friend stand on the center console! This was only possible because the windshield wasn't yet installed. Even with this, some slight modifications were needed to get the ash tray to fit properly.
The passenger side under dash card board and hydra is in place and the rubber floor mats are in. On the side of the radio console you can see some bodgery on the top edge of the console. and incorrect screws I'm currently using to hold the console. These should be knurled thumb screws. I am also missing the toe board at this point. I'll measure one from another car and cut it out eventually.

The seat covering didn't go smoothly. I left this to last knowing it would be a challenge. I have installed the material over the front edge of the seat. The steel frames were powder coated before installing replacement wood. The original wood on my seat frames was completely rotten. XK's have replacement kits. I made a mistake when installing the wood on one of seats. I had to buy a new set of leather seat cover and foam. One more of many little setbacks.
This is a seat bottom before the foam is glued down. I bought elastic and burlap from a fabric store and stapled it in as was done at the factory. Then I glued the seat cushion foam down and pulled the leather seat cover over. This was a fairly easy part of the process.
This is the seat back biscuit before covering. I replaced the original elastic with similar modern material. You can see the two metal stiffeners on the sides. These were used to keep the ply wood from cracking.
I had never covered a seat before so learned the hard way that it’s really important to figure out where the rubber and leather will go before you start. In this shot you can see that I have the foam rubber glued in and I cut the extra rubber away from the edge of the seat. Big mistake, I actually had the wood where the leather is supposed to tack down on the inside edge in the wrong place, so the foam installed wrong and when the leather cover was in place it didn't match the seat back biscuit, this showed a big staple area and was not really something I could fix without replacing the seat cover. So, I ordered a new seat cover and foam and started over. It was an expensive mistake but typical of the kind of thing that happens the first time you do something.
Here is a shot of the incorrectly installed wood on the back of the seat. You can see the correct holes below the ones I created. I can't remember why I did this but sure learned the hard way that it wasn't going to work.

Here is a close up of the seat and seat belt after I got done, looks pretty nice. I got the seat belts from XKs Unlimited, the buckles don't have the Jaguar logos, but these were after-market adds in 1963 so many cars came with generic seat belts.

Installing the door panels was tedious. I had to drill a few extra holes in the door for the snaps. It was much harder getting the doors adjusted properly so that they closed easily and I am still struggling with this. The actual fitting of the door panel trial and error. It is important to make sure that the latch sticking plate is shimmed not too far out. If it is too far out it can snag the edge of the door panel and ruin the edge. I will replace the Driver's side door panel because of this damage.
I opted to use period correct rubber floor mats on top of the carpets. These are available from the usual suppliers.
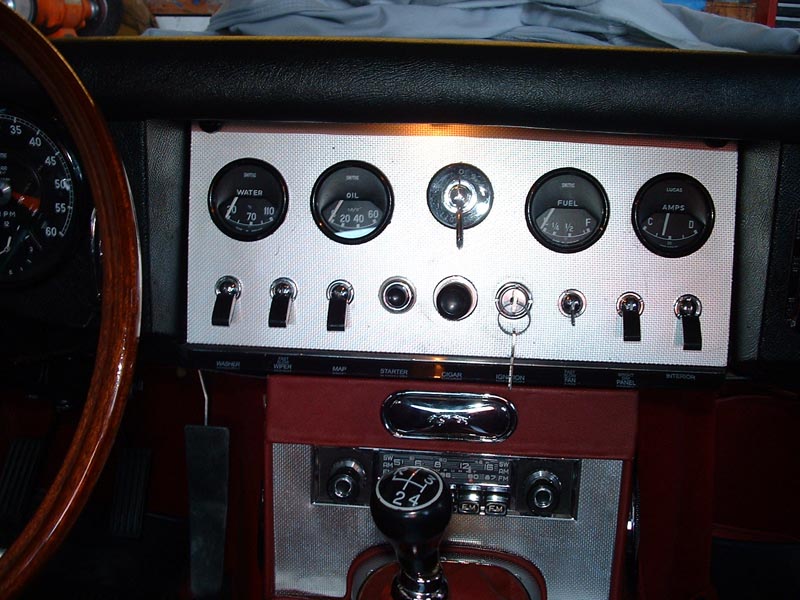
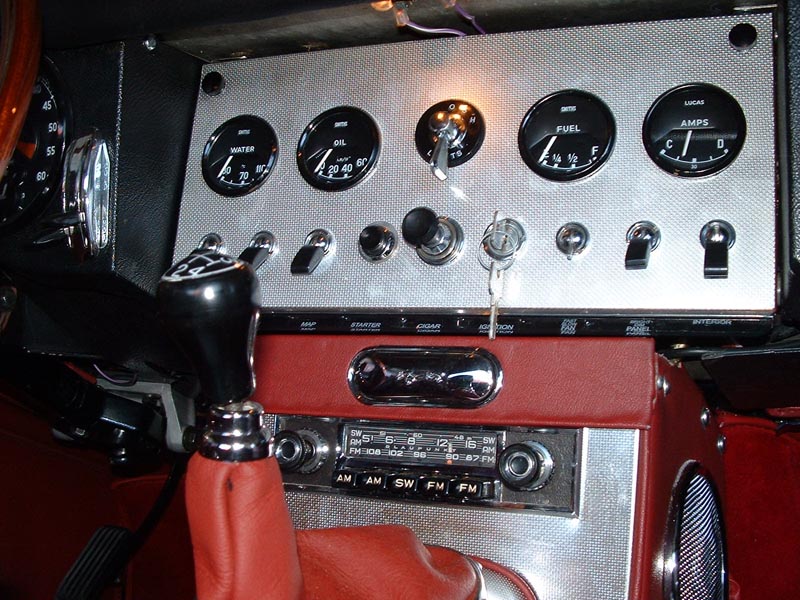
The Radio is in and working here, this was a major pain area but after a couple weeks of sweat and blood its working fine and the center dash will open. You can see I am missing one switch tip, this fell off when I was opening the dash and went into the radio console. It will rattle out eventually.
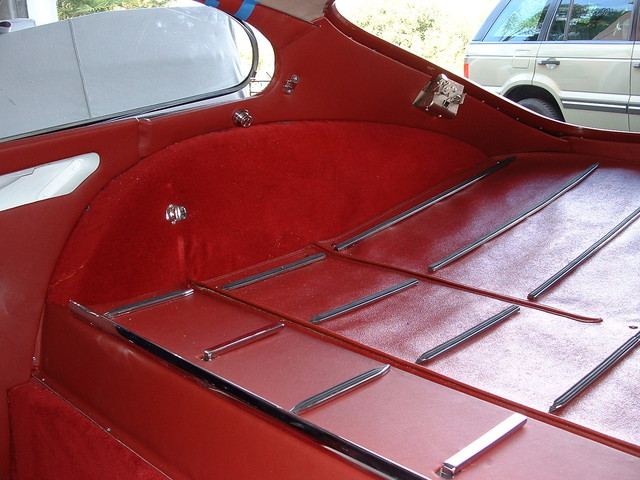
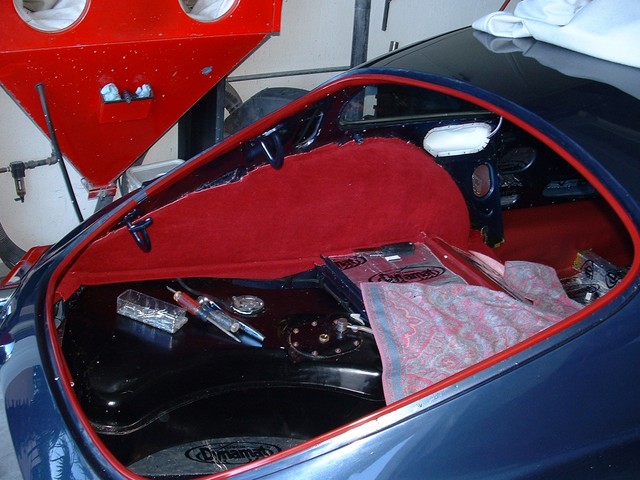
One more shot of the luggage area. I still have some fine tuning to do on the hatch lid but otherwise it’s all done. Also notice that I am missing the vent window latch. I broke part of this installing it. This part was only on 61-63 FHC. It took me a while to find a replacement. Luckily a Jaguar friend happened to have one in his spare parts stash and now I'm back in business!
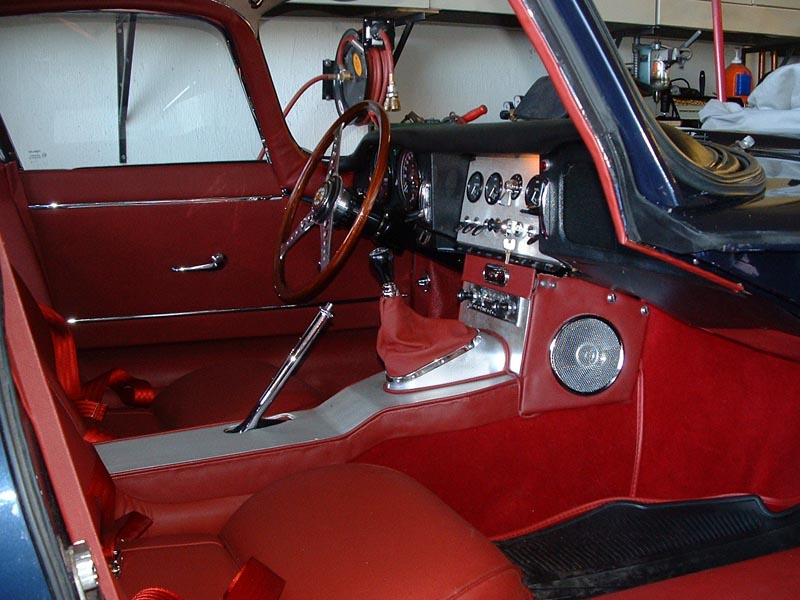
Here is another interior shot of the door panel on the driver's side and center console. Looks good to me!
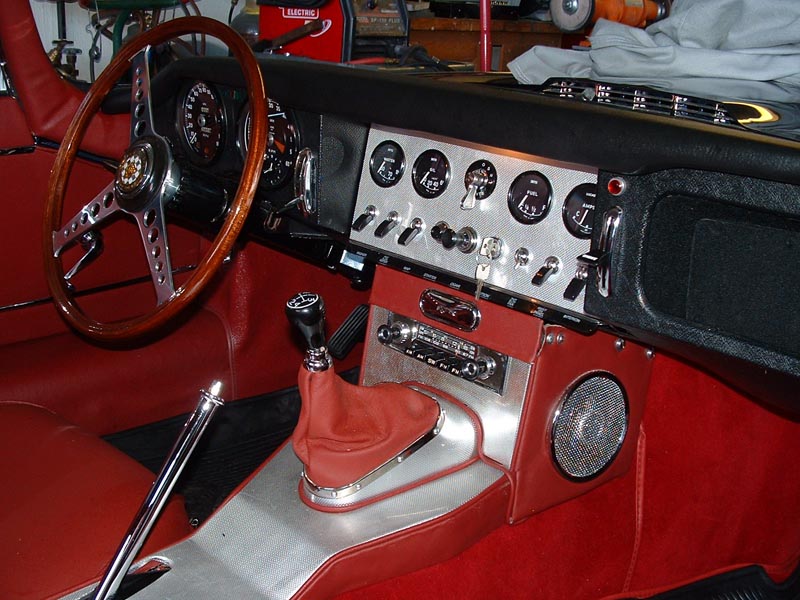
Another Dash view. I just love the look of the E-type Dash!
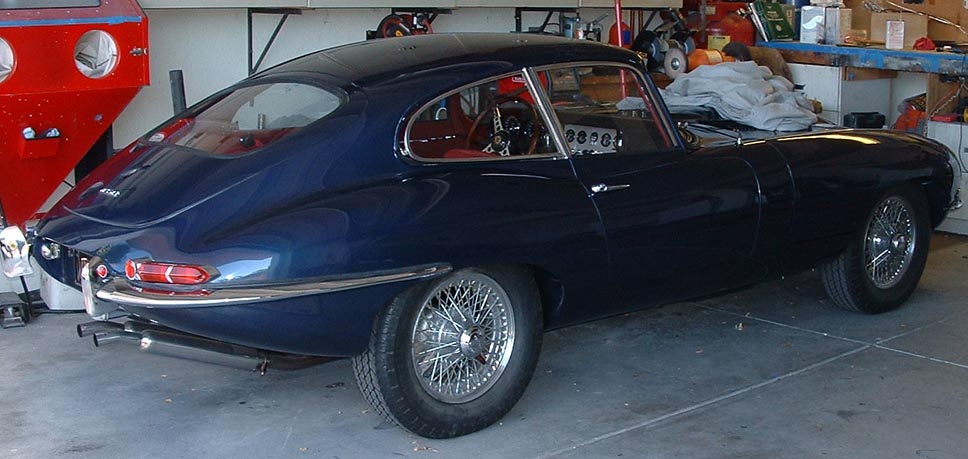
Ready for a drive!! At this point the car only has three miles on the odometer from a few test drives around the block. It is still missing the windshield and some chrome. When I had a glass installer come by to put in the new windshield we found it to be to big!! This was caused by the extensive roof replacement. The replacement windshield was found to be 3/16" larger than the opening. The glass installer was familar with correcting these issues. He took the windshield to his shop and ground it down to fit. It took him 2 tries but he made it work. Next its time for an alignment and new wheels and tires. After five and a half years I am really looking forward to being done.