How to block sand a car
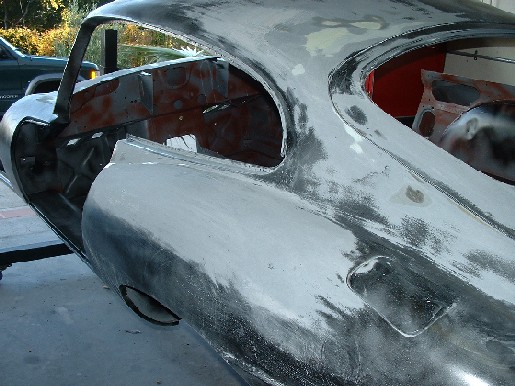 Just getting started
with block sanding here, it is huge, huge, huge, labor! I had no idea when I started
this how much work it would really take. It was over 100 hours to get the first
pass of sanding done. This showed of hundreds of high and low spots. The black
guide code is standard hardware store spray paint which I used to show of low
spots. Just spray on over the High build primer and sand off. Any silver sand
through is a High spot, and low spots show up black. The weapon of choice for
this sanding is a 20" flexible sanding board for big panels an 11 inch block
for medium with a six inch block for details. I started off with 220 grit wet
and dry sand paper.
Just getting started
with block sanding here, it is huge, huge, huge, labor! I had no idea when I started
this how much work it would really take. It was over 100 hours to get the first
pass of sanding done. This showed of hundreds of high and low spots. The black
guide code is standard hardware store spray paint which I used to show of low
spots. Just spray on over the High build primer and sand off. Any silver sand
through is a High spot, and low spots show up black. The weapon of choice for
this sanding is a 20" flexible sanding board for big panels an 11 inch block
for medium with a six inch block for details. I started off with 220 grit wet
and dry sand paper.
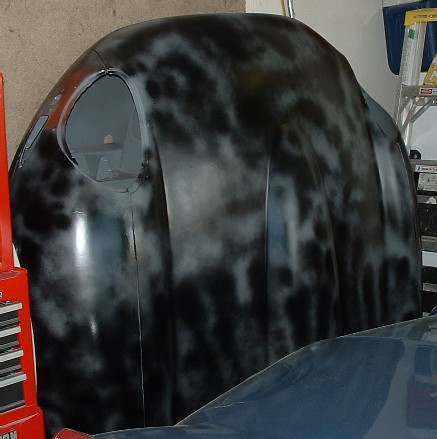 Here's the bonnet
waiting for its turn, Although it looks good from a distance you wouldn't believe
how many problems the long board found.
Here's the bonnet
waiting for its turn, Although it looks good from a distance you wouldn't believe
how many problems the long board found.
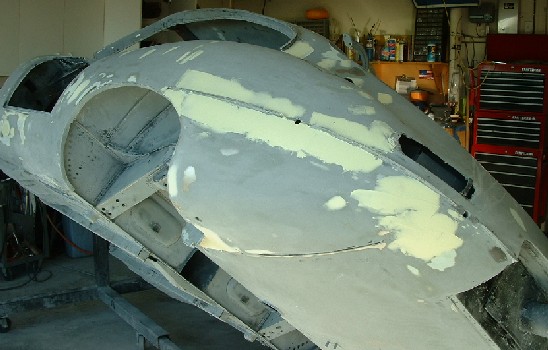
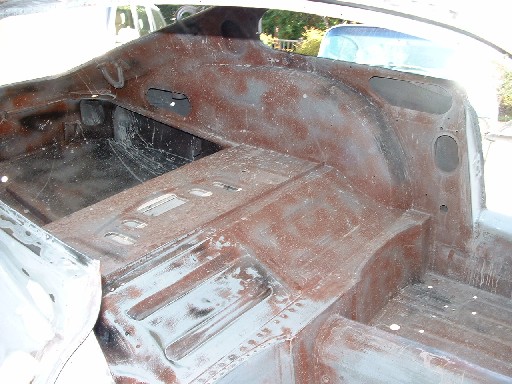 I want the inside
of the body to have a nice finish so decided to prime and sand out the inside
of the body too. I won't spend anytime filling high and low spots but at least
want a nice smooth finish. I will end up with two coats of high build primer over
two coats of DP40. Then two coats of color and two coats of clear.
I want the inside
of the body to have a nice finish so decided to prime and sand out the inside
of the body too. I won't spend anytime filling high and low spots but at least
want a nice smooth finish. I will end up with two coats of high build primer over
two coats of DP40. Then two coats of color and two coats of clear.
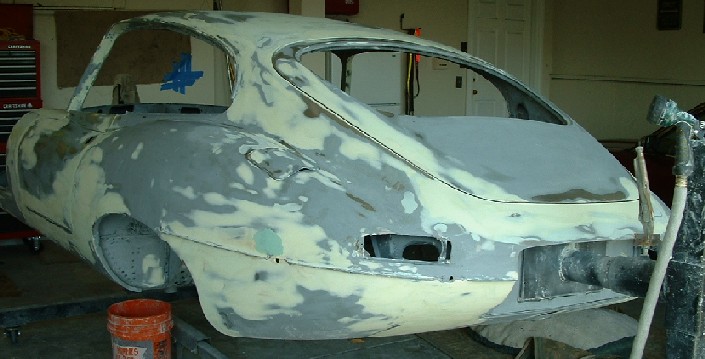
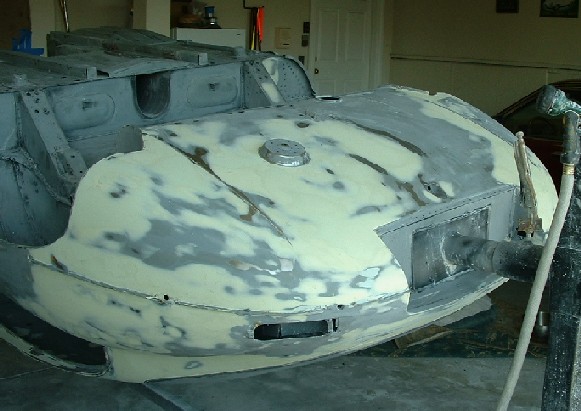
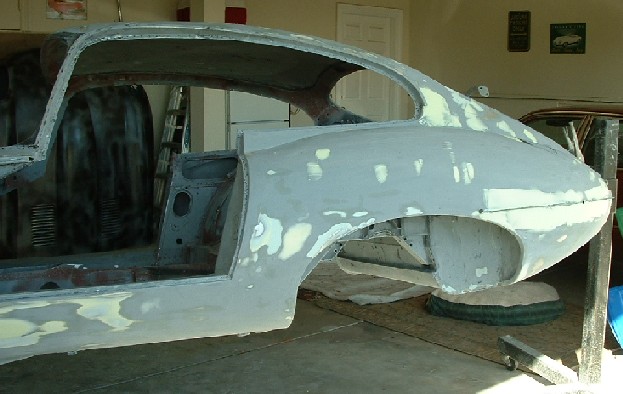 After getting
the first guide code off, you can really see the problems. Most of the yellow
the gray is two part polyester glaze putty made by Evercoat. Its a special bondo
that is creamy and easy to sand, it's used to build up minor low spots. Before
all the hights and lows are worked out I'll go through many bottles. Even though
it is much easier to cut than regular plastic filler it still sands best with
150 or 180 Grit vs 220. I opted to wet sand as the dust from sanding is a huge
problem in a household environment. If possible save this work for summer months,
it would really be no fun in the winter.
After getting
the first guide code off, you can really see the problems. Most of the yellow
the gray is two part polyester glaze putty made by Evercoat. Its a special bondo
that is creamy and easy to sand, it's used to build up minor low spots. Before
all the hights and lows are worked out I'll go through many bottles. Even though
it is much easier to cut than regular plastic filler it still sands best with
150 or 180 Grit vs 220. I opted to wet sand as the dust from sanding is a huge
problem in a household environment. If possible save this work for summer months,
it would really be no fun in the winter.
 Here is a good
example of the a sanded door getting some low spots filled. You can see the darker
gray areas along the bottom of the door which are high spots. I'll need to build
these up with filler and block them out. In the back ground you can see the bottle
of plastic filler I'm using and some sand paper etc. This step was kind of a waste
of time I should have gone ahead and mounted the doors on the car before filling
them I ended up with allot more filler and sanding before it was done.
Here is a good
example of the a sanded door getting some low spots filled. You can see the darker
gray areas along the bottom of the door which are high spots. I'll need to build
these up with filler and block them out. In the back ground you can see the bottle
of plastic filler I'm using and some sand paper etc. This step was kind of a waste
of time I should have gone ahead and mounted the doors on the car before filling
them I ended up with allot more filler and sanding before it was done.
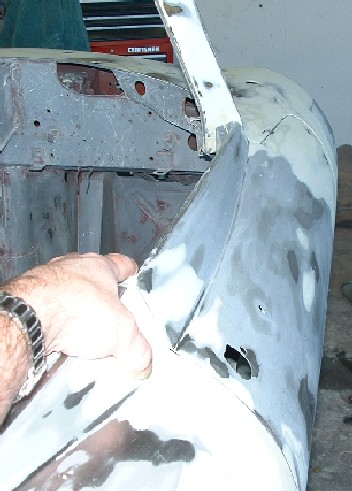
The door is
on getting lined up on the car, I'm building up with filler to get a perfect
fit. Each door took about 25 hours. When its complete there should be no metal
showing through and everything should be sanded out so that the edges of the
door are perfectly aligned with the body. Make sure you think about the extra
paint build up on the edges and make the gaps a bigger than you want them when
finished. I will be adding 3 more coats of high build primer, then a possible
sealer coat depending on the color choice, then 4-5 coats of clear. This will
add up to allot of paint.
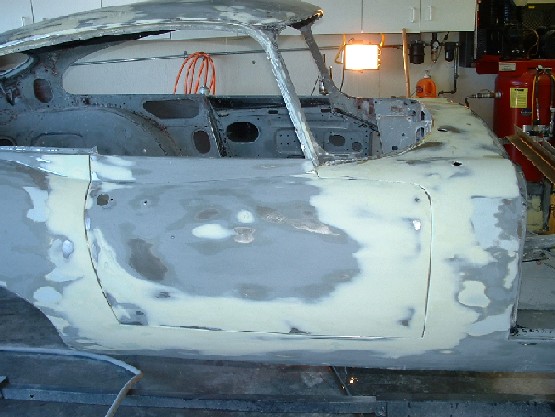
 Things are getting
close here. Need to fill and sand out a few of the high spots. For larger high
spots I use a body hammer to ding them down and then fill over. Most of the highs
visible in this picture are very minor and should be covered by the next 3 coats
of High build. Its a bit of a gamble but I can touch them up if I have some sand
through at the end.
Things are getting
close here. Need to fill and sand out a few of the high spots. For larger high
spots I use a body hammer to ding them down and then fill over. Most of the highs
visible in this picture are very minor and should be covered by the next 3 coats
of High build. Its a bit of a gamble but I can touch them up if I have some sand
through at the end.
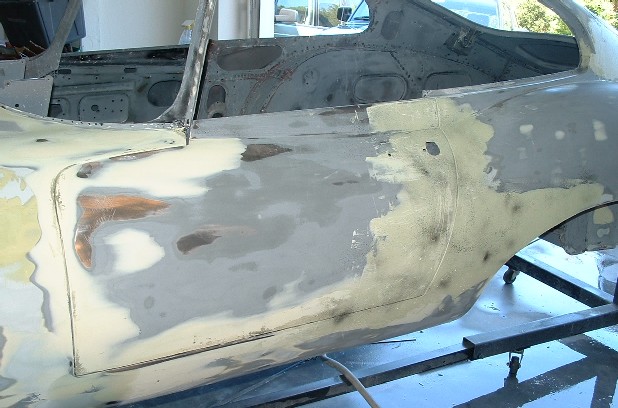
 You can see from
this shot how much build up was required to get a perfect edge. The filler is
no more that 1/16" thick but this took about 5 passes with plastic sanding
in between to get right. Sanding with an 24 inch long board was the quickest way
to find the highs, and the guide coat shows off the lows.
You can see from
this shot how much build up was required to get a perfect edge. The filler is
no more that 1/16" thick but this took about 5 passes with plastic sanding
in between to get right. Sanding with an 24 inch long board was the quickest way
to find the highs, and the guide coat shows off the lows.
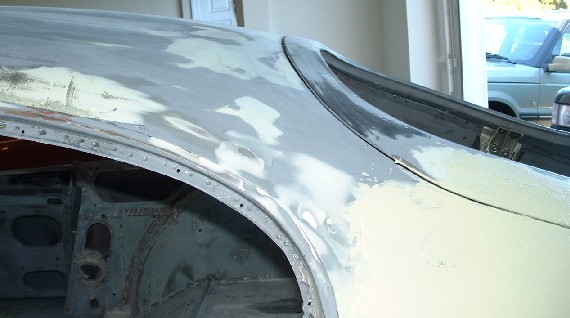
Now here is
a problem. The rear deck lids on these cars never fit correctly from the factory,
add to this the fact that this car was in a major rear end and it spells lots
of work. I'll need to build the roof up about 1/8" to get the lid flush,
and then cut the lower drip sill and lower it about 1/4" to get a perfect
fit. More on this later.
Even though
the trunk tub was new metal, it still had a number of high and low spots that
needed to be worked out. I created a few installing the tub, but most were production
flaws from the factory. If I had this to do over I would have inspected much
more closely before priming and hammered more dents out.
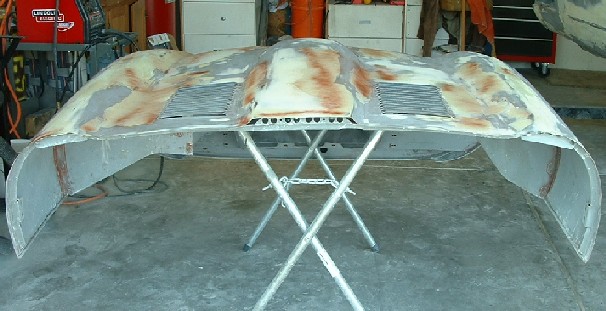
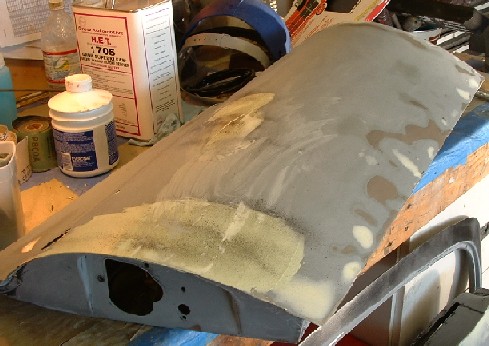
The bonnet
after the first pass of block sanding and some filler was added. I spent a good
solid month getting all the high and low spots out. Here I'm about 80% done
with blocking the filler out and will shoot another coat of high build primer
and sand out again. Before I shoot color three cycles of prime and sand cycles
will be done. The final coat(s) will be done with the bonnet mounted to the
car.
Many hours
of filling and sanding later the rear deck is getting close. I filled up my
shop trash can with Worn out sand paper at least 3 times between the first Primer
coat and the second. The first coat showed off all the problems. After the second
coat of primer I'll switch to 400 grit and then 600 on the finial sand.
Here the bottom
is getting the same treatment. Notice how much filler was needed even on a new
panel. I can't see how anyone can properly restore a car for profit.
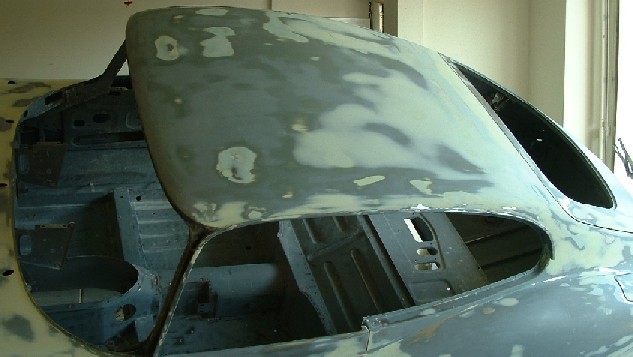
The roof gets
the same, This car was particularly bad as it had been in a serious accident.
The only good news about block sanding is that it gets easier as you go. The
first coat and filling is the bulk of the work. The second coat (not shown here)
went in about one third the time with 400 grit, and the final coat will be about
the same.
More Primer and Paint!