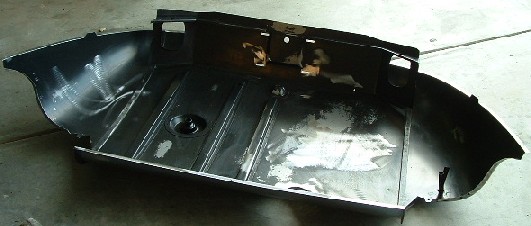
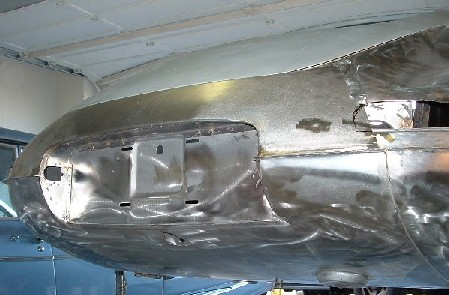
The
replacement tub came straight from Martin Robey with the worst primer coat you
could imagine, I guess they had to put something down to prevent flash. I spent
the better part of a day stripping it before starting seriously fitting to the
car. Its hard to see in the picture but the fuel tank support which should be
in the left corner didn't come with the tub so I'll have to find one of these
somewhere. Otherwise the tub was perfect. Several minor differences in the new
tub vs the original. Drain holes were added to the front of the tub where water
tends to stand, and the fuel drain pipe has two inputs instead of a single pipe
which was on the original. I'm sure the judges will give me a break on these items
unless they plan to put the car on a rack for inspection.
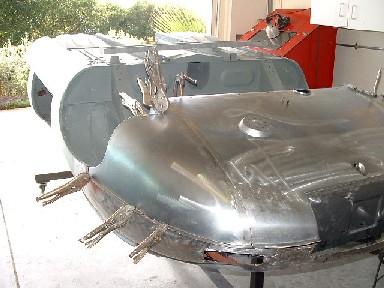
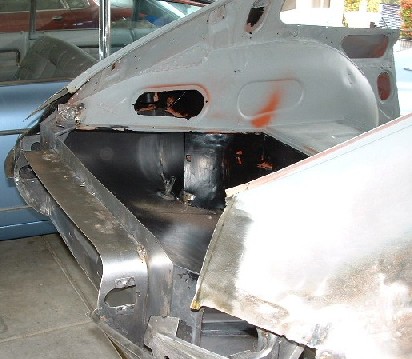
Just trying to
get an idea what I'm up against before stripping the tub. Fortunately its roughly
in the ball park, but still very far from fitting well enough to clamp down and
weld. The first job is to add the inner support brackets to each side of the tub,
and cut out the old tail light housing area to replace with new fillers shown
below. Its important to get a good clean lower lip around the body to work with
since this is the basis for alignment of the tub. Fitting the tub consists of
hundreds of little cuts, bends and bangs to get it all lined up. To much to describe
here, but all simple enough if you are confronted with it.
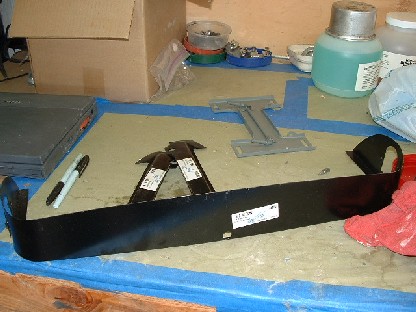
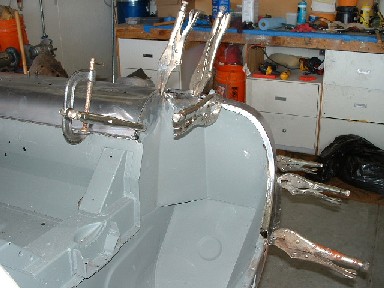
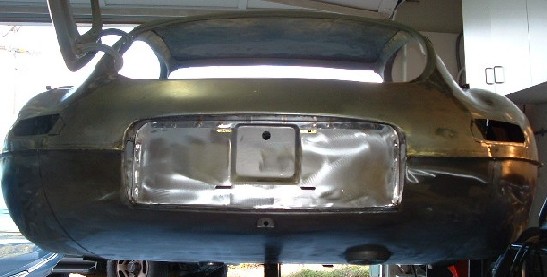
Here are the two
lower tail light fillers and the license plate surround. I tack welded the license
plate frame in for a short time just to see how things would line up and then
removed it. The frame will go back in after the tub is welded down while fitting
the upper deck area. The Tail light surrounds were welded in first after cutting
out the old rusted and mangled ones.
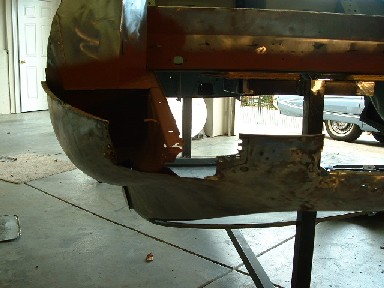
Here you can see
the cut out tail light surrounds. Replacing these was easy at this point and helped
firm up the overall integrity and original shape of the rear end. I'll weld in
the outer side of the fillers first and finish the rest after I put the top deck
sheet metal in last.
How many sets of
vise grips do you own? I have at least a dozen sets and still could have used
more when finial fitting. It took about 10 hours of fitting before I was ready
to weld. I drilled holes through the lip and simulated spot welds by filling the
holes with the mig welder. If your doing this try and weld a little from both
sides and make sure that the two sides are completely flush with each other. I
try and put a vice grip right next to the weld hole.
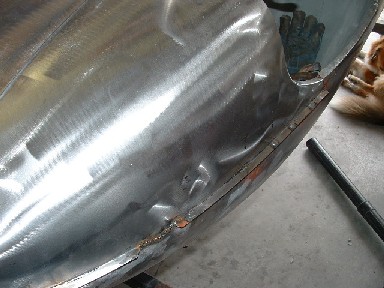
Areas like this
were a challenge. Some shaping to the body had to be done to make the new tub
line up. As before holes were drilled and then welded up after everything is perfectly
in line. I put seam sealer in to fill any slight cracks or holes left between
the panels, and welded up as much as possible around the wheel well where water
will be trying to enter. The wheel wells originally weren't water tight and this
was one of the major causes of the rust problems in the inner panels. I tack weld
only and skip around the area to let other parts cool to avoid warping.
Welding time! Just
start filling in the holes along the seam, after this gets stitched in dress out
the wheel wells and start on the license plate area. The hardest part of this
process is remembering not to go to quickly and over heat the metal. Stitch weld
everything especially the alignment joint in the center of the picture. The alignment
tabs are the logical starting point for welding as they could only fit in one
place give or take 1/4" or less.
After getting
all the welds in on the lower tub it was time to flip the car over and work
on the closing panel. Flipping the car without the rear rotisserie was a challenge.
I used the engine crane and rope with a steel loop which would allow the rope
to slip through the loop. Tie the Rope around the body, running it through the
loop. Then lift the body. Once the body is free of the stand and high enough
to make the rotation thread the rope through the loop and rotate the car. I
modified the same stand I had used for the inverted position to fit under the
car resting on a wood shim right where the parking brake adjustment hole is
located. Until the rear end is completely finished I didn't want to risk mounting
the the rotisserie to the license plate.
Several hours of
fitting and measuring were spent up front before cutting out the old deck. It
is easy to get frustrated when trying to get a panel lined up in all the right
places. Its very easy to cut to much and have big problem. mark things several
times and cut small amounts and recheck. After the best possible fit is obtained
clamp the panel in with vice grips and tack weld in the panel.
The deck is
all tack welded in now. The joint along the hatch lid was impossible to get
perfect. I was able to get the bottom and inside edge lined up perfectly but
the outside edge was not nearly as sharp a bend on the new part as the original.
I wonder if this part was stamped out on the same tooling as the original, or
if this is a part that is made with new tooling. Overall its a minor problem
. I can fill in with weld and lead to get it perfect. Getting the license plate
frame to line up wasn't easy either. One side was perfect while the other was
slightly off. I will have to use a little lead to blend it in.
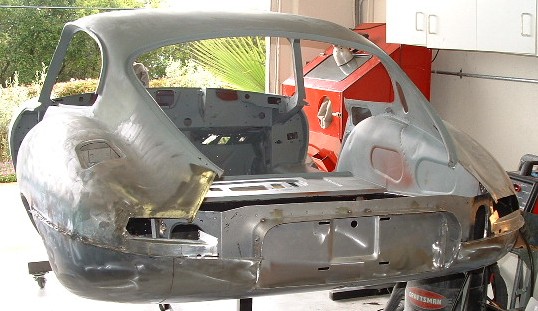
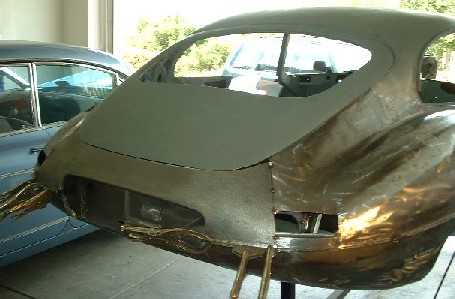
Looking pretty
good here, the edge of the license plate frame still needs a little bit of work
on the passenger side but its very close. I haven't trimmed out the tail light
holes yet. Will use the old sheet metal as a pattern and then install new mounting
hardware, I'll trial fit the tail lights and skim lead in to get a perfect fit.
I'll do the same for the rear bumpers. Its looking allot better than it did
when I started!
I didn't spend
to much time on getting the hatch alignment perfect at this point the main idea
was just to make sure that the contour of the body was right and that the lower
gap wasn't to small. it will be a big job to get the hatch in perfectly.
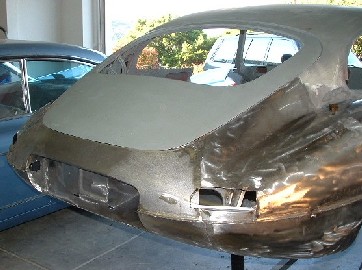
One more picture
of the rear end. I was really happy with how well the deck lid fit in and the
overall shape of the tail. It needs more finishing work but is going require very
little plastic filler or lead around the hatch jam.